When building a website, it’s common to upload files to your hosting space—such as the WordPress installation package, themes, plugins, images, or PDF resources. So, how exactly do you upload files to your hosting server? This article explains the most common methods in a simple and beginner-friendly way, applicable to most shared hosting and cloud hosting environments.
1. Using the File Manager Provided by Your Hosting Panel
Most hosting providers offer a built-in File Manager in their control panel (e.g., cPanel, DirectAdmin, or aaPanel), allowing you to upload files directly through a web interface.
Steps:
- Log in to your hosting control panel (e.g., cPanel).
- Find and click on “File Manager”.
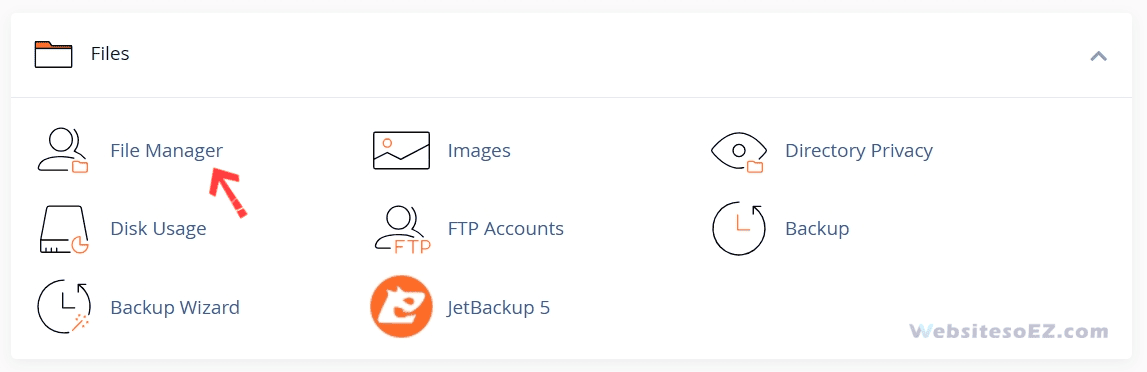
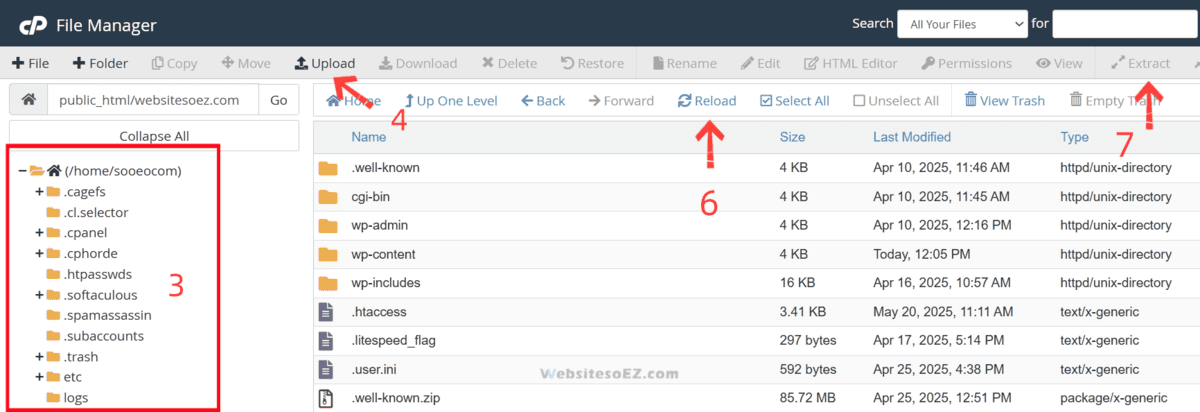
- Navigate to your website’s root directory (usually
public_htmlorwww). - Click the “Upload” button at the top.
- Select files from your computer to upload.
- Once uploaded, refresh the directory to see your files.
- To speed up the upload process, you can compress the files into a ZIP archive, upload it as a whole, and then extract it online.
✅ Best for: Complete beginners who prefer a visual and straightforward method.
2. Uploading via FTP Client (Recommended)
FTP (File Transfer Protocol) is one of the most efficient and commonly used methods to manage website files. It allows batch uploads, folder transfers, and faster performance.
Popular FTP Tools:
- FileZilla (Free, cross-platform)
- WinSCP (Windows)
- Cyberduck (macOS)
What You’ll Need:
Your hosting provider will give you FTP login details, typically:
- Hostname (e.g., ftp.yourdomain.com)
- Username
- Password
- Port (usually 21)
Or create a new FTP account in the control panel:
- Log in to your hosting control panel (e.g., cPanel).
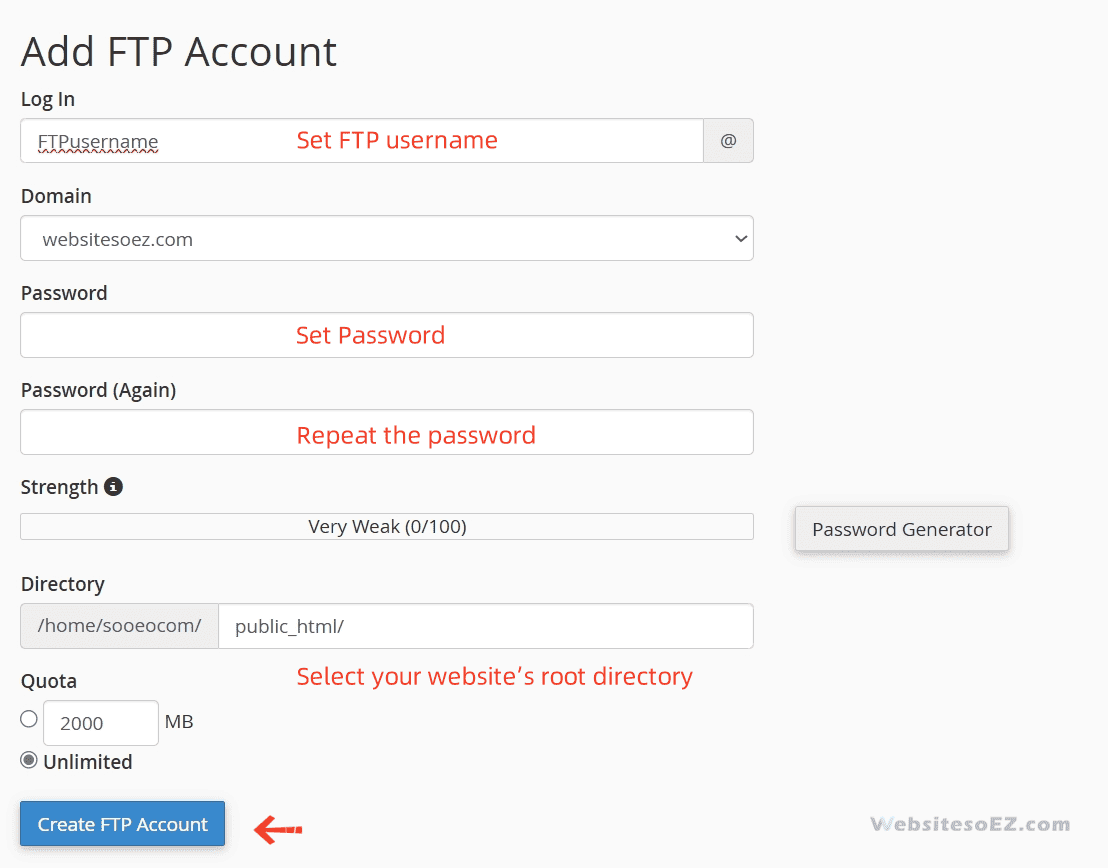
- Find and click on “FTP Accounts”.

- Add FTP Account.
- Set the FTP username.
- Set Password.
- Select your website’s root directory.
- Create FTP Accounts.
Upload Steps (Using FileZilla as Example):
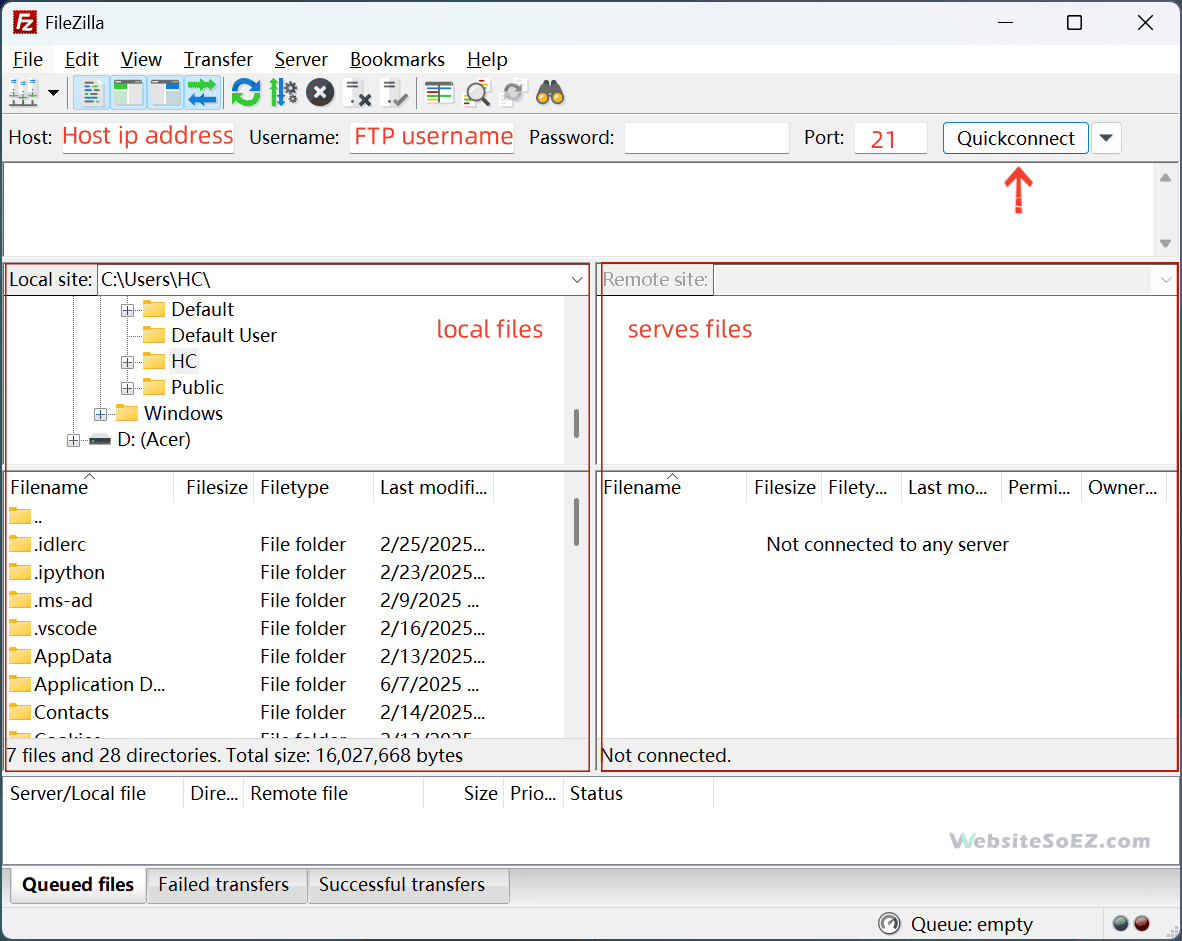
- Install and open FileZilla(Download FileZilla Client).
- Enter your FTP credentials and click Quickconnect.
- The left panel shows your local files, the right shows your server.
- Navigate to the root directory (e.g.,
/public_html) on the right. - Drag and drop your files/folders from left to right to start uploading.
- Or right-click on the file you want to upload and select “Upload”.
- Monitor upload progress at the bottom panel.
✅ Best for: Users managing multiple websites or large file transfers.
3. Uploading Files via WordPress Dashboard (For Media, Themes, Plugins)
If you’re using WordPress, certain types of files—like images, documents, themes, and plugins—can be uploaded directly from the admin dashboard.
Uploading Media Files:
- Log in to your WordPress dashboard.
- Go to Media → Add New.
- Drag and drop files or click Select Files to upload.
Uploading Themes or Plugins:
- Navigate to Appearance → Themes → Add New → Upload Theme (ZIP files only).
- Or go to Plugins → Add New → Upload Plugin.
⚠️ Upload Limit Note: Your hosting’s PHP settings may limit file size (e.g., 2MB). For larger files, use FTP instead.
4. Tips and Best Practices
- File Permissions: If uploaded files can’t be accessed or run, check and adjust file permissions (commonly 755 for folders, 644 for files).
- ZIP Uploads: For large folders, compress them into a
.zipfile and extract them via the file manager after upload. - Naming Conventions: Avoid using spaces, special characters, or non-English names. Stick to English letters and underscores for best compatibility.
Final Thoughts
Learning how to upload files is a foundational skill in managing your website. For beginners, the file manager is the easiest way to start. As you grow more confident, FTP becomes an essential and powerful tool.