As the world’s most popular Content Management System (CMS), WordPress has attracted countless users with its ease of use and powerful features. Whether you want to build a personal blog, a corporate website, or an e-commerce platform, installing WordPress is the first step. This article will provide you with a detailed introduction to the WordPress installation process, covering mainstream installation methods to help you successfully start your website-building journey.
Before you begin the installation, you’ll need the following:
- Domain Name: This is the unique address of your website on the internet, for example, .
websitesoez.com,You'll need to purchase a domain name from a domain registrar. - Web Hosting: This is the server space where your website files and database will be stored. Choosing a reliable hosting provider is crucial, and many providers offer WordPress-optimized hosting plans.
- FTP Client (Optional): For example, FileZilla. If you choose to install WordPress manually, you’ll need an FTP client to upload files to your server. This step may not be necessary for one-click or control panel installations offered by many hosting providers.
Once you have these basic requirements, let’s look at the main WordPress installation methods:
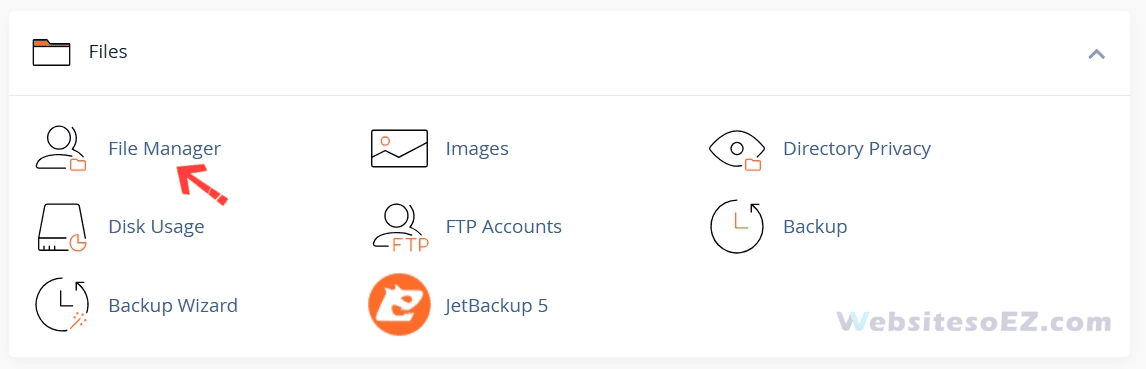
Method 1: Using Your Web Host’s “One-Click Installation” Feature
This is currently the easiest and quickest way to install WordPress, especially suitable for beginners. The vast majority of mainstream web hosting providers (such as SiteGround, Bluehost, GoDaddy, Kinsta, etc.) offer WordPress one-click installation tools (sometimes called Softaculous, Fantastico, or other script installers) in their control panels (e.g., cPanel, Plesk).
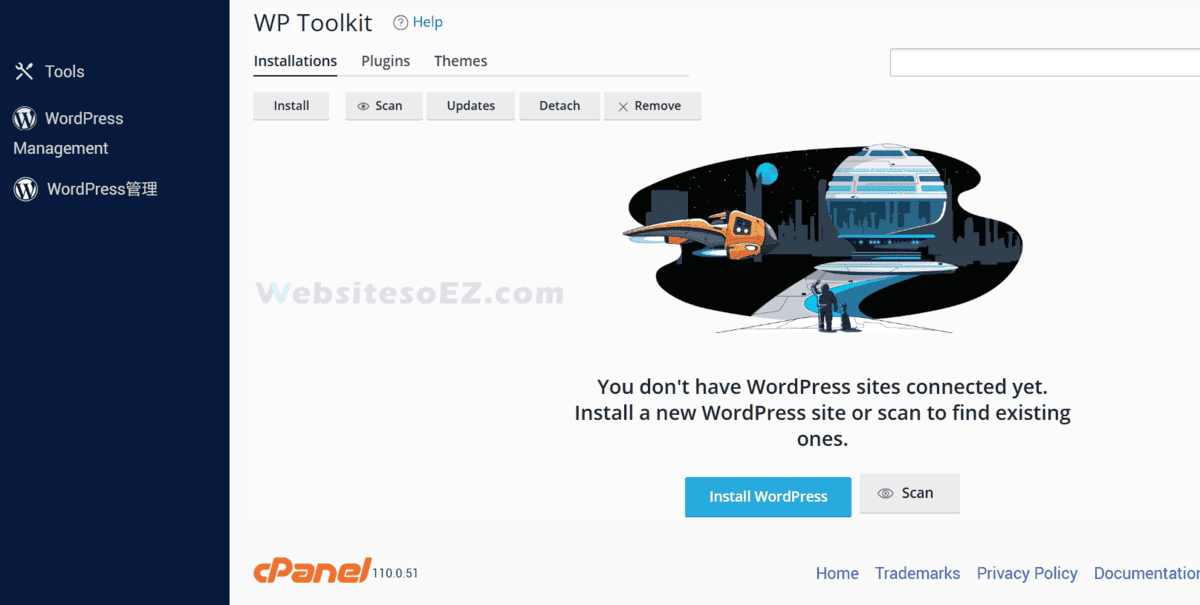
The steps are usually as follows:
- Log in to Your Web Hosting Account: Visit your hosting provider’s website and log in to your client area or control panel.
- Find the WordPress Installation Tool: Look for options like “WordPress Installer,” “Softaculous Apps Installer,” “Website Builder,” or “One-Click Installs” in your control panel.
- Select WordPress and Start the Installation: Click on the WordPress icon and follow the on-screen instructions.
- Configure Installation Options:
- Choose Installation Path: You can usually choose to install WordPress on your main domain (e.g.,
yourwebsite.com) or in a subdirectory (e.g.,yourwebsite.com/blog). For a new website, installing it in the root directory of the main domain is recommended. - Fill in Website Information: Set your Site Name and Site Description.
- Set Up Admin Account: Create your WordPress Admin Username, Admin Password, and Admin Email. Be sure to use a strong password and remember this information, as it will be your login credential for the WordPress dashboard.
- Select Language: Choose the language you want for your WordPress dashboard and website default.
- Database Settings (Usually Handled Automatically): One-click installers typically create and configure the database for you automatically.
- Advanced Options (Optional): Some installers may offer advanced options like choosing a database name or table prefix; beginners can usually leave these as default.
- Choose Installation Path: You can usually choose to install WordPress on your main domain (e.g.,
- Click Install: After confirming the information, click the install button. The installation process usually takes only a few minutes.
- Installation Complete: Once successfully installed, you will see the WordPress login URL (usually ) and your admin username. You can now visit this URL and log in to your WordPress dashboard using the username and password you set up to start managing your website!
yourwebsite.com/wp-admin
Pros: Simple, fast, no need to manually handle file uploads or database creation, low technical barrier.
Cons: Customization might be slightly less than manual installation, but it’s sufficient for the vast majority of users.
Method 2: Manual WordPress Installation (The Famous “5-Minute Install”)
If you want more control over the installation process, or if your hosting provider doesn’t offer a one-click installation tool, you can choose to install WordPress manually. While it might sound complicated, it’s not too difficult if you follow the steps.
The steps are as follows:
1.Download the WordPress Package:
- Visit the official WordPress website: https://wordpress.org/download/
- Download the latest version of WordPress (a .zip archive).
2.Resolve the Domain Name
- Log in to your web hosting control panel, go to the domain settings, and add a new domain. Enter the domain name you purchased—do not include “www”.
- Log in to your domain management dashboard, point the DNS to the IP address of your hosting server, and wait for the changes to take effect.
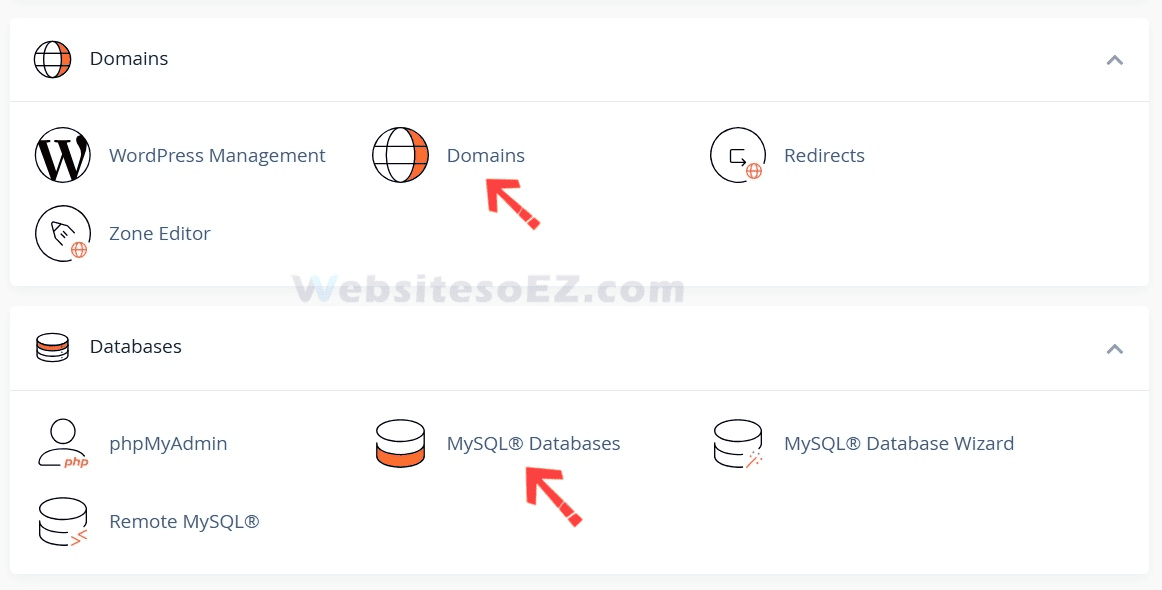
3.Create a Database and a Database User:
- Log in to your web hosting control panel (e.g., cPanel).
- Find the database management tool, usually “MySQL Databases” or “Database Wizard.”
- Create a new database: Give your database a name (e.g., ).
wp_yourdbname - Create a new database user: Set a username (e.g., ) and a strong password. Be sure to note down the database name, username, and password, as you’ll need them for configuration later.
wp_user - Add the user to the database and grant all privileges: Ensure the newly created user has all operational privileges for the newly created database.
4.Configure the wp-config.php File:
This step can be skipped—enter the relevant information on the installation screen.
- Extract the WordPress .zip file you downloaded to your local computer.
- In the extracted folder, find the file named .
wp-config-sample.php - Rename this file to .
wp-config.php - Open the file with a text editor (like Notepad++, VS Code, Sublime Text; avoid using Windows Notepad to prevent encoding issues).
wp-config.php - Find and modify the following lines of code:
// ** Database settings - You can get this info from your web host ** //
/** The name of the database for WordPress */
define( 'DB_NAME', 'database_name_here' ); // Replace 'database_name_here' with your database name

/** Database username */
define( 'DB_USER', 'username_here' ); // Replace 'username_here' with your database username

/** Database password */
define( 'DB_PASSWORD', 'password_here' ); // Replace 'password_here' with your database password

/** Database hostname */
define( 'DB_HOST', 'localhost' ); // Usually 'localhost', but some hosts might provide a specific hostname. Check with your host.- Authentication Unique Keys and Salts: To improve website security, it’s recommended to generate unique security keys. You can visit https://api.wordpress.org/secret-key/1.1/salt/, which will automatically generate a set of keys. Copy the generated content and replace the corresponding section in the file.
wp-config.php - Save and close the file.
wp-config.php
5.Upload WordPress Files to Your Server:
- Use an FTP client (like FileZilla) to connect to your web server. You’ll need the FTP hostname, username, and password from your hosting provider.
- Determine the upload directory:
- If you want to install WordPress on your main domain (e.g., ), upload all files and folders from the extracted WordPress folder (not the WordPress folder itself) to your website’s root directory, usually
public_html - If you want to install WordPress in a subdirectory (e.g., blog), create a folder named in your server’s root directory, and then upload the WordPress files into that subdirectory.
yourwebsite.com/blog
- If you want to install WordPress on your main domain (e.g., ), upload all files and folders from the extracted WordPress folder (not the WordPress folder itself) to your website’s root directory, usually
- The upload process may take some time, depending on your internet speed and the number of files.
6.Run the WordPress Installation Script:
- In your web browser, go to your domain name.
- If you uploaded files to the root directory, visit .
http://yourwebsite.com - If you uploaded files to a subdirectory (e.g., blog), visit .
bloghttp://yourwebsite.com/blog
- If you uploaded files to the root directory, visit .
- If everything is configured correctly, you will see the WordPress installation wizard interface.
- Select Language: Choose your preferred language and click “Continue.”
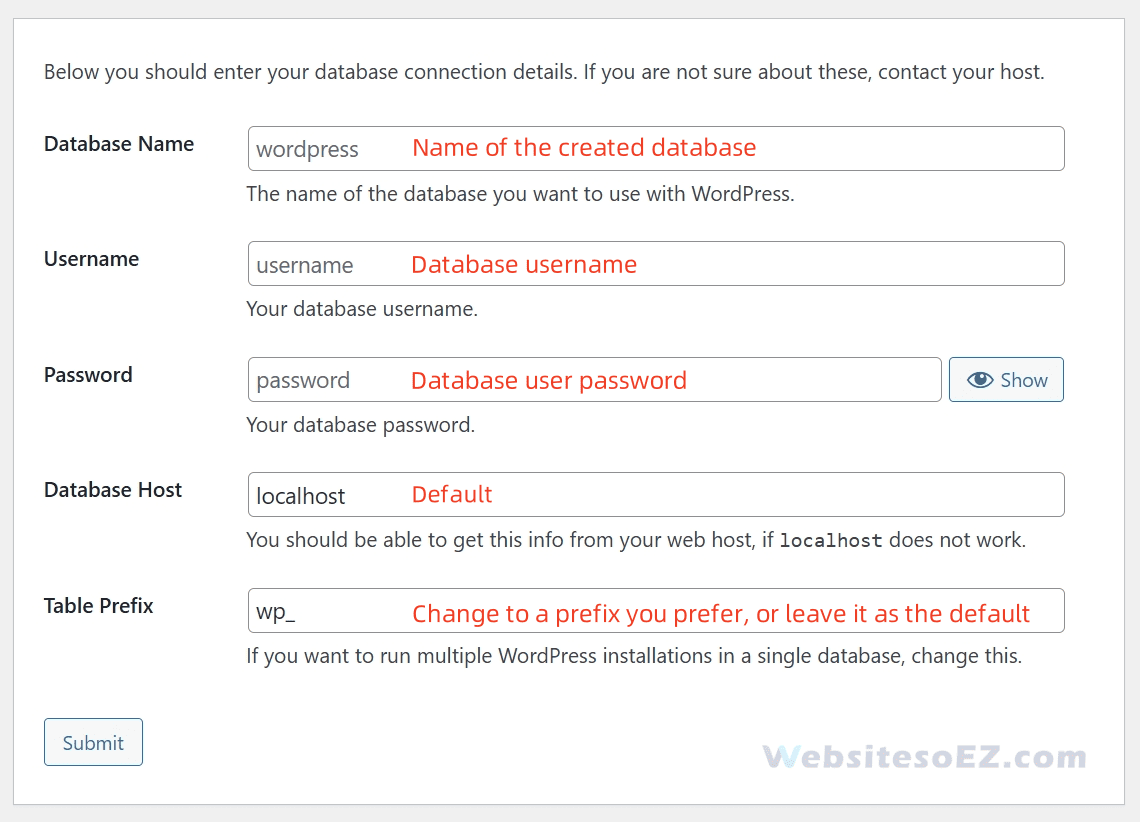
- Connect to the database.If you have configured the wp-config.php file, skip this step.
- Database Name:Name of the created database.
- Username:Database username.
- Password:Database user password.
- Database Host:Default. If an error is prompted, please contact your hosting provider.
- Table Prefix:Change to a prefix you prefer, or leave it as the default.
- Fill in Website Information:
- Site Title: The name of your website.
- Username: Your admin username for logging into the WordPress dashboard (Do not use “admin” as the username for better security).
- Password: Set a strong password.
- Your Email: For receiving notifications and password resets.
- Search engine visibility: If you don’t want your site to be indexed by search engines while it’s under construction, you can check the box “Discourage search engines from indexing this site.” You can change this setting later once the site is ready.
- Click the “Install WordPress” button.

7.Installation Successful!
- After the installation is complete, you’ll see a success screen indicating that WordPress has been installed.
- Click the “Log In” button, and use the admin username and password you just set to log in to your WordPress dashboard (
yourwebsite.com/wp-admin).
Pros: Full control over the installation process, helps in understanding WordPress’s basic file structure and configuration.
Cons: More steps involved, can be slightly challenging for beginners, and prone to errors in database configuration or file upload stages.
Important Post-Installation Steps
Regardless of which method you used to install WordPress, it’s recommended to perform the following actions after installation:
- Check Basic Settings: After logging into the dashboard, check “Settings” -> “General” to ensure the Site Title, Tagline, WordPress Address (URL), Site Address (URL), Administration Email Address, and Timezone are correct.
- Set Permalinks: Go to “Settings” -> “Permalinks” and choose an SEO-friendly permalink structure, such as “Post name.”
- Delete Default Content: WordPress comes with some default posts, pages, and comments. You can delete them.
- Install Necessary Themes and Plugins: Choose and install a suitable theme to style your website and install necessary plugins to enhance functionality (e.g., SEO plugins, security plugins, caching plugins).
- Update Regularly: Keep the WordPress core, themes, and plugins updated to their latest versions to ensure website security and stability.
- Set Up Backups: Regularly backing up your website files and database is crucial to prevent data loss in case of accidents.
By following these steps, you should be able to successfully install WordPress and start building your online platform. Happy website building!