WordPress is renowned for its flexibility and ease of use, and much of this is due to its powerful theming system. Themes control the visual design and layout of your website, making it possible to create a unique and professional-looking site without needing to code from scratch. In this article, we’ll explore what WordPress themes are, how to choose the right one, how to install and activate themes, and how to customize them to suit your needs. We’ll also touch on the theme editor and the precautions you should take when using it.
1. What is a WordPress Theme?
A WordPress theme is essentially the design template that determines the visual appearance of your website. It controls how your content is displayed, including the layout, colors, fonts, and overall style. Think of a theme as the “skin” of your WordPress site—it wraps around your content and presents it in a way that’s visually appealing and functional.
Themes are made up of a collection of files, including:
- Templates: These define the structure of different pages, such as the homepage, blog posts, or contact pages.
- Stylesheets: These handle the design elements, like colors, fonts, and spacing.
When you install a theme, you’re applying a pre-designed look to your site, which you can then customize to fit your specific needs. Whether you’re building a blog, a business site, or an online store, the right theme can make all the difference in how your content is perceived by visitors.
2. How to Choose the Right Theme?
Choosing the right theme is a critical step in building your WordPress site, as it affects both the aesthetics and functionality of your website. With thousands of themes available, it can be overwhelming to pick the perfect one. Here’s a guide to help you make an informed decision.
2.1 Official Theme Directory
The safest and most recommended place to find free themes is the official WordPress theme directory. All themes here are reviewed by the WordPress team to ensure they meet standards for security, functionality, and compatibility. This is a great starting point, especially for beginners.
2.2 Third-Party Theme Marketplaces
If you’re looking for more variety or premium options, third-party marketplaces like ThemeForest or Elegant Themes offer both free and paid themes. These platforms provide a wider range of designs, often with advanced features. However, it’s important to vet the theme developers for reliability, as not all third-party themes are created equal.
2.3 Free Themes vs. Paid Themes
- Free Themes: Ideal for beginners or those on a tight budget. They are fully functional but may lack advanced features or dedicated support.
- Paid Themes: Often come with more customization options, regular updates, and customer support. If you need a feature-rich theme or plan to run a professional site, investing in a paid theme can be worthwhile.
2.4 Key Considerations When Choosing a Theme
When selecting a theme, keep the following factors in mind:
- Responsive Design: Ensure the theme looks good on all devices, especially mobile phones and tablets.
- Update Frequency: A theme that’s regularly updated is more likely to be secure and compatible with the latest version of WordPress.
- User Reviews: Check what other users are saying about the theme. Look for feedback on ease of use, support, and any issues they’ve encountered.
- Technical Support: If you’re not tech-savvy, having access to reliable support can be a lifesaver.
By carefully evaluating these aspects, you can choose a theme that not only looks great but also performs well and meets your site’s needs.
3. Installing and Activating Themes
Once you’ve chosen a theme, the next step is to install and activate it on your WordPress site. There are two main ways to do this: searching and installing directly from the WordPress dashboard or uploading a theme file.
3.1 Online Search and Install
- Go to your WordPress dashboard.
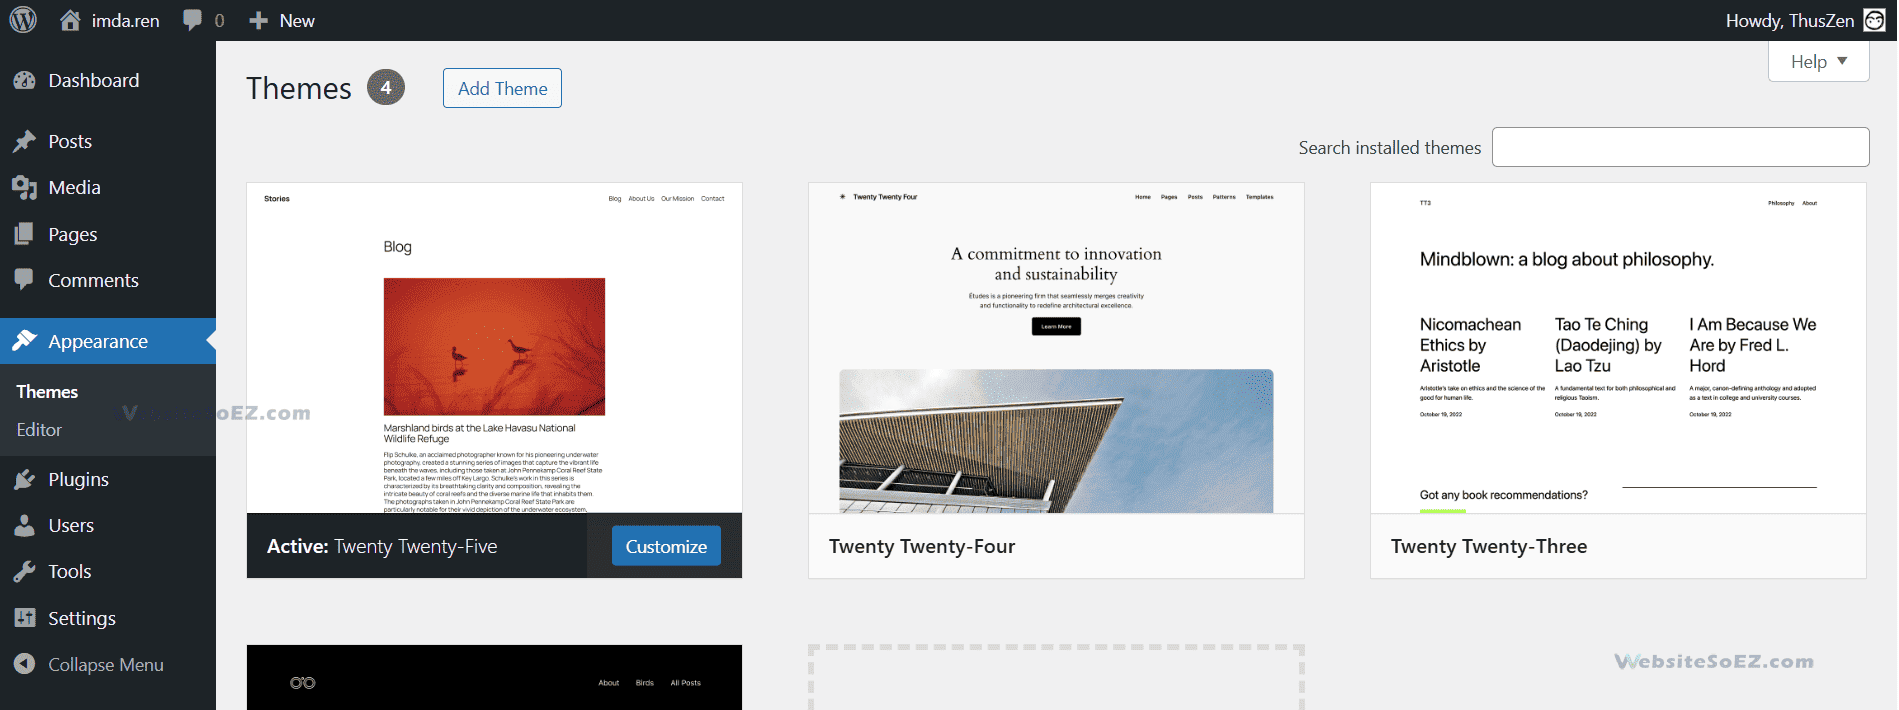
- Navigate to Appearance > Themes > Add Theme.
- Use the search bar to find a theme you like.
- Click Install, and once it’s installed, click Activate to apply it to your site.
This method is quick and easy, especially for themes available in the official directory.
3.2 Upload and Install
If you’ve purchased a theme or downloaded one from a third-party site, you’ll need to upload it:
- Download the theme file (usually a .zip file).
- In your dashboard, go to Appearance > Themes > Add Theme > Upload Theme.
- Select the .zip file and click Install Now.
- After installation, click Activate.
Now that your theme is active, you can begin customizing it to match your brand or preferences.
4. Theme Customization (Customizer)
WordPress makes it easy to customize your theme without needing to write any code, thanks to the built-in Customizer tool. This feature allows you to tweak various aspects of your theme’s appearance and see the changes in real-time.
Here’s an overview of the key customization options available in the Customizer:
4.1 Site Identity
- Logo: Upload your brand’s logo.
- Site Title and Tagline: Set the name and description of your site.
- Site Icon (Favicon): Choose a small icon that appears in browser tabs and bookmarks.
4.2 Color Schemes
Adjust the colors of various elements like headers, links, buttons, and backgrounds to match your brand’s color palette.
4.3 Background Images/Colors
Set a background image or color for your entire site. This can help create a cohesive look across all pages.
4.4 Menu Settings
Create and manage navigation menus to help visitors find their way around your site. (More details on menus will be covered in the next section.)
4.5 Widget Settings
Add and arrange widgets in sidebars or other widget-ready areas of your theme. Widgets can include things like search bars, recent posts, or social media links. (This will also be covered in more detail later.)
4.6 Homepage Settings
Choose whether your homepage displays your latest blog posts or a static page (like a welcome page or landing page).
4.7 Additional CSS
For those with some knowledge of CSS, this section allows you to add custom styles to further tweak the design of your site.
Some themes may offer additional customization options specific to their design, so be sure to explore all the settings available in the Customizer to make the most of your theme.
5. Theme Editor (Use with Caution)
For more advanced users, WordPress provides a Theme Editor that allows direct editing of theme files, such as PHP, CSS, and JavaScript. While this can be powerful for making custom tweaks, it’s also risky:
- A small mistake in the code can break your site.
- Any changes you make might be overwritten when the theme is updated.
If you need to make customizations beyond what’s available in the Customizer, it’s safer to use a child theme. A child theme inherits the functionality of the parent theme but allows you to make modifications without affecting the original files. This way, your changes are preserved even when the parent theme is updated.
Pro Tip: Always back up your site before making any changes in the Theme Editor, and proceed with caution.
Conclusion
WordPress themes are the backbone of your site’s design and functionality. By choosing the right theme, installing it correctly, and customizing it to fit your needs, you can create a professional and engaging website. Remember to prioritize responsive design, regular updates, and good support when selecting a theme. And while the Theme Editor can be a useful tool for advanced users, it’s important to use it carefully and consider using a child theme for customizations.
With these insights, you’re well-equipped to make the most of WordPress’s powerful theming system and create a site that stands out.
